Friday, April 26, 2013

Tips for Perfect Digital Scrapbook Layout with Picture

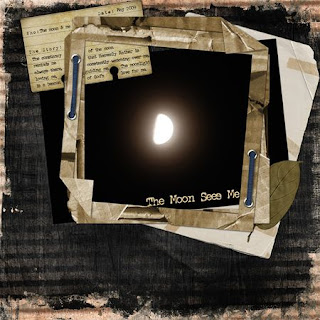
Digital Scrapbook Layout with Picture
When you are working with set scrapbook templates, making certain your photo is the right fit is a big part of making your scrapbook pages look their best
Part of the art of digital scrapbooking design is making certain all of the different elements match up and look their best in design. You want to ensure your embellishments appear as 3-D as possible, you know it's important to make certain your digital layouts offer a color scheme that compliments your scrapbooking crafts and you only add the latest in online technology. All of these features are critical to creating the best creative digital scrapbooks you can, but a simple thing like getting your photos in order can really make or break a project.

Adobe Photoshop is a simple program with easy to solve fixes. Here are some tips to help you get started upgrading one of the key features of your digital scrapbook through Adobe Photoshop your pictures.

Get Rid of Red Eye

If the pictures are taken with a flash instead of natural lighting, the odds of red eye are huge. The good news is that the problem is an easy one to fix.

Using the Adobe Photoshop Program, all you have to do is select the red eye tool brush. Zoom in on the eyes and then adjust the brush size to the size of the pupils in the photo. Go to Sampling (found up towards the right of Help) and select First Click. Click on the red eye area and Voila! The pupil will turn back to black.

Crop Your Photo to Fit

When you are working with set scrapbook templates, making certain your photo is the right fit is a big part of making your scrapbook pages look their best. Cropping your photos will help achieve this. Select the crop tool, found three down on the left hand side of the tools. Click on crop options and enter the size and width you need the picture to be for your digital scrapbooking layouts. Hit Enter to crop the image. Save the new version.

Clean Up the Background

If background photo clutter is interfering with your creative scrapbooking vision, put that clutter away. Blurring out these distractions is a cinch with a few simple steps.

Open your photo and click on the Lasso icon. This tool will appear in the second row down on your left hand side. Use the lasso to circle the part of the picture you want to have as your main focus. Go up to Select and click on Inverse then go back to Select and click on Feather. Before you get wild and start to feather, head on up to Enhance and adjust your Color until you get to the Hue and Saturation option. There, you are simply going to de-saturate the color that's there until it no longer catches the eye.

If you are just getting started with digital scrapbooking, fixing your pictures is one of the key things you can do to ensure a quality scrapbook page. Take the time to perfect your images and you will be on your way to perfecting the art of creative scrapbooking.

The words Professional and Scrap don't sit that well together. Evidently to design the layout for a professional scrapbook you will need a little bit of organized chaos.

Fancy cutting skills will not do the trick this time! You need to be pro at tearing and overlaying the items in your book.

Make it look as though you can’t be bothered, yet really it took you ages to perfect. Kind of like the 'just got out of bed' hair look, that people seem to go for these days. It takes hours to perfect, and a bucket load of styling gel, yet people think you have amazing hair even though you can’t be bothered. More fool them!

Fashion over function is not always a necessity though when creating the ultimate scrapbook. It does need to look appealing, otherwise you won’t want to read back through it, or add to it ever again.. But! it has to be easy on the eye, you defiantly don’t want the pages falling out or random photos from years ago getting lost due to your badly glued over decorated rookie layering.

This will take you many years of practice, and many more to master.

Yet, with much dedication, maybe one day you will have a scrapbook worthy of leaving on your kitchen cupboard for your new girlfriend to pick up and think. "Wow this guys too cool for school!" Same applies for girls, although your new boyfriend might not be too interested in seeing a photo montage of your ex lovers!
Saturday, April 20, 2013

Great Scrapbooking Ideas

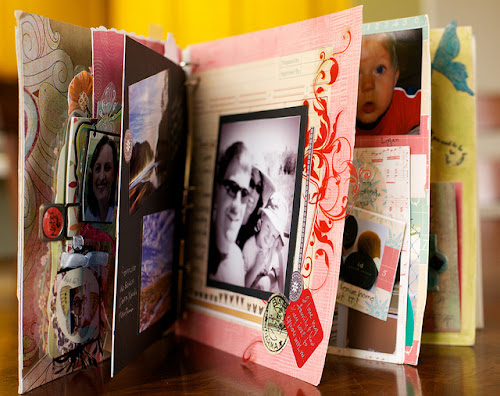
Do you need a gift idea for that really hard to buy and find for someone special on your list? How about a scrapbook highlighting the top 10 reasons you love them! Using 3 paper lunch bags, various scrapbook papers, glue and some unique stickers you can create a quick, easy and inexpensive creative gift they will treasure forever! These books are perfect for grandparents, friends, animal lovers and even teachers! Let's get started creating your one of a kind holiday treasure.

Items that you need to make the scrapbook:
  1. You will need 3 plain brown paper lunch bags. You can find these easily at any grocery store, they come in brown or in white and either color will work.
  2. Layer your bags alternating closed end and open end.
  3. Fold bag in half and staple at each end in the middle.
  4. Congratulations! You've just created a mini-scrapbook for just pennies! Now, let's get started personalizing your gift.

Decorating the scrapbook:

If you are using the brown paper bags you may wish to cover the brown bag with some scrapbook paper cut to size. Before gluing the scrapbook paper to the bag I recommend either sanding the bag lightly or using double sided table to adhere the paper to the bag. There is a light wax coating on the bag and not all scrap-booking glues adhere to the paper bags. By sanding or using double sided tape you can be sure that your paper will stick to the bag. I personally like to add scrapbook paper to the front and back covers to enhance the look. It gives it a more finished look and it takes the reader a couple of minutes to realize it’s made from lunch bags! which of course then, makes you look extremely creative!

Great scrapbooking ideas

Here are a few tips to help you organize your book:
  • Choose 10-12 photos that you want to use in your book.
  • On a separate sheet of paper write out your top ten reasons with fancy font.
  • Choose your paper and cut to size.
  • Glue background paper on to the paper bag.
  • For a more interactive book, you can add paper to the open portions of the book so the reader can pull-out pictures etc. to look at.
  • Match your pictures with your top ten reasons.
  • Choose your cover photo and put together your cover with some highlight text.
  • Start putting your book together by gluing on your photos to each page and adding your reasons.
  • Once you have your paper, pictures and reasons in the book go back and add in any stickers or other scrapbook embellishments to your creative taste.
  • I like to sign and date my books on the back cover and voila! You have a completed mini scrapbook that your reader will enjoy reading over and over!
Need more top 10 book ideas?

Top ten reasons we love grandma/grandpa - ask your kids for the reasons on this one!
  • Top ten reasons we are best friends.
  • Top ten reasons you are a great neighbor.
  • Top ten reasons I love you - this one works for just about anyone!
  • Top ten reasons you are a great dog/cat owner - from the pets point of view.
  • Top ten reasons you are an amazing teacher.
  • Top ten reasons I'm proud you are my daughter/son/mother/father etc.
  • Top ten reasons you are a great girl scout/boy scout/youth group leader.
These are just a few ideas, think of all the special people in your life and you'll come up with all kinds of scrapbooks to make! Happy Scrapping!

Friday, April 19, 2013

Simple Scrapbooking Layouts and Elements

Scrapbooking layouts and elements

Are you looking to brush up on your scrapbooking skills or even just wondering where to get started. Here's the low down on everything you need to know to get started.

Most scrapbook layouts will have these elements, even though each page is different: photographs, embellishments, cardstock, memorabilia, patterned paper, journaling and of course your title.

Title: A title will tell your readers what your page is about. It can be both creative and functional. Titles come in many different forms, including rub-ons, stickers, cardboard, die cuts or wood. Don't forget your handwriting could also be wonderful and creative.

Simple Scrapbooking Layouts and Elements
The bits that you want to add to your scrapbook layout that form part of your story are called memorabilia

Journaling: Because the essence of scrapbooking is preserving your memories for future generations, journaling is the writing that tells your reader what the page is about, or other details that may be forgotten such as dates, or even people's names.

Photographs: Your scrapbook wouldn't quite be a scrapbook without them. The photographs make up the centre piece of the story that you are trying to convey. It is totally up to you how many photographs you want to include in your layout. Try to stick to the same theme or occasion.

Embellishments: Embellishments are like decorations to use on your layout. These could include flowers, buttons, stickers, ribbons or whatever you fancy that suit's the theme of your scrapbook layout.

Memorabilia: The bits that you want to add to your scrapbook layout that form part of your story are called memorabilia. These could include souvenirs from events like museum cards, brochures, menu's, and even old letters written by loved ones.

Cardstock: Cardstock is usually the base of any scrapbook page layout. The most popular layout size is 12 x 12 inches. Cardstock comes in many forms and colors. To make a double page, just use two sheets side by side. Cardstock is also often used to matt photographs or frame photographs within your layout.

Patterned Paper: Patterned paper is used to decorate your layout and also to complement your theme. This can be found in either paper weight or cardstock weight and there are so many different varieties available, you will find something for every occasion. A note for new scrapaholics. Always remember to use acid free products, as you want your scrapbook to last. Always look for products that are lignin and/or acid free. This means that the process of card and paper manufacture has been regulated to neutralize acid and remove lignin. Both these elements can cause your scrapbook layout to deteriorate over time.

What is a simple scrapbook?

When used in reference to scrapbooks, the word simple doesn't mean it is simply or quickly done with little effort at creativity or formatting. Instead it refers to a scrapbook, which covers the simple everyday things that usually don't make it to the pages of traditional scrapbooks such as transforming a room's decor or creating a new flowerbed. Simple scrapbooks also have a decisive starting and ending point.

A Simple Scrapbook Has An Ending

Most scrapbooks never end as they are continued in the next book, where the last one left off. Simple Scrapbooks have a distinct beginning and ending. As in the example of adding a room to your house, when the room is finished and decorated, there is nothing more to add to the scrapbook. Another example would be My Ancestors, your family may continue to grow but you will never have more ancestors than you have now so it's perfect for a Simple Scrapbook.

Framework Of A Simple Scrapbook

The frame work of a simple scrapbook will often include the same items as a traditional scrapbook, beginning with a title page that gives your scrapbook its name, the dates covered, name of the creator, and in general sets the style and tone of the scrapbook.

The second page in the framework will be the dedication or introduction page where you list any information that will help readers to understand why the scrapbook is meaningful. It can face the title page or can have a page of its own.

The third page will be a table of contents or table of sections if needed. For example if your Simple Scrapbook is about school projects, you could have sections by the date or by the season or if it is about adding a new room to your house the sections could be Planning, Laying The Foundation, The Framework, Finishing The Inside, Decorating and so on.

Following the table of contents page will be the filler pages with photos and other keepsakes you wish to include. The final page will be the closing page that ties it all together.

Choosing The Format

Only you can limit the number of colors or materials you include in your scrapbook, however choosing a few main elements that will appear on every page such as colors, stamps, design paper or even ribbons will tie your pages together in a meaningful scrapbook.

For example you wouldn't want all the pages to be the same color except for one and neither would you want your photo frames all square with only one oval. The title page usually sets the formatting choice of things such as colors, torn or cut borders and fonts used for captions.

You can make your simple scrapbook as large or small as you choose. Just because it is a simple scrapbook doesn't mean you can't spread your wings and make it as fancy or creative as you like.

Tuesday, April 9, 2013

Fun Scrapbooking Ideas for Your Whole Household

Scrapbooking has become a very popular family or personal hobby, and for good reason. Not only it can be a lot of fun, but it is also an artistic way to preserve and exhibit your photo collection with extractive layout. While looking at pictures by themselves is alright, they are much more fascinating and fun to view when they are arranged in a stylist scrapbook format. There are so many unique papers and embellishments to choose from that you can effectively customize a scrapbook page to properly accentuate and display your pictures. All of your family can have fun with it too, which is an extra benefit. You will find that the crafts listed below will really help you to get some excellent ideas for some fun to do with your loved ones or your family.

Framed Scrapbook Pages

Just because the majority of scrapbook pages are displayed in albums layout doesn't mean they can't be displayed in picture frames if desired. This method for displaying can be especially successful if you have a handful of pages that turn out especially nice. It is also an excellent way to provide a constantly changing display of pictures in your home. Simply display one page for some time, then return it to its scrapbook album and put up another. To make these pages as an activity for the family, provide everyone with a nice selection of photos. There are a number of cases, particularly when little kids are doing their own pages that you will want to use copies of the pictures instead of the originals. Of course, if you're using digital pictures or scan images, you can simply make additional prints as needed. Give everyone a piece of scrapbook paper to use as a base or background for the page. Offer a good selection of scrapbook paper, embellishments, stickers and adhesives. If the children are small, be sure to only use safety scissors. Some kids also really enjoy using scissors that are particularly designed to cut fun and wavy edges. It's normally a great idea to base your pages on a theme such as a favorite pet, a fun Christmas or Thanksgiving, or a vacation that the whole family loved. When finished, show your favorite pages in basic scrapbook picture frames.

Individualized Scrapbook Albums

If you discover that your family truly enjoys scrapbooking, you can make it a regular activity. Numerous families find that arranging a "family scrapbook day" every month or even weekly can be a lot of fun. Give each family member their own personal album which they can fill with the pages they decorate. Each person will have their own style and preferences, and those ought to be seen in the pages they create.

Do not forget, when it comes to decorating photos with papers and other decorations, there really is no right or wrong way. During every day of scrapbooking everybody can work on any number of pages, many or few. While some family members may want to finish multiple basic pages, others may spend an entire scrapbooking session creating one intricately designed page. You will most likely find that scrapbooking together as a family will help you develop a whole new understanding of the importance of getting plenty of family photos. You might even discover that those scrapbooking sessions you arrange every week or month could become your family's new favorite activity to do!

The last thing you should know is that unless you're having a great time, you're missing the point of "scrapping". So just have fun with your love one or family, relaxing and making the most of your quality time together with this great hobby.

Friday, April 5, 2013

How to Scrapbook Vermont Retreats

Scrapbooking is one way that many people keep track of special events and experience in their lives such as weddings, pregnancies and new babies, and family vacations. While it is not difficult to scrapbook as many people think, you do need a creative imagination and technique. Vermont is one of the colorful subject to scrapbook because of all the attractions and recreational activities you and your family can see and do. Scrapbooking can be as expensive as you want it to be. The only thing that is really required is a blank scrapbook and some markers.

Below is the guide to walk you through the Vermont scrapbooking process:-
  • Use pictures that were taken at different Vermont attractions such as the Ben and Jerry's factory, historical sites, museums, theaters, flea markets, concerts and festivals to include in your scrapbook or search from internet to find out the related images. Because Vermont was one of the original 13 colonies, there are dozens of historical sites all across the state that you can visit during your retreat.
  • Take several pictures while performing activities. Gather mementos such as brochures, wrist bands from each site you visit. According to United Health Foundation, the American Public Health Association and Partnership for Prevention, Vermont is the healthiest state in America, and as such, there are a lot of recreational activities, such as bike trails, hiking trails, boating, skiing, parks and outdoor games to be played. The state also has campgrounds, beaches, national forests and outdoor sports, such as fishing, to enjoy.
  • Cover the pages of your scrapbook with memorabilia. Include brochures, stickers, coasters and any other small tidbits you take from your adventures. Glue them down next to the photographs with some explanation text or by themselves. If the brochures open, you can be creative in the attachment process and allow the viewer to open the brochure.
  • Add extra decorations and fancy lettering to make the page pop up. You can purchase stickers from the craft section in a store for scrapbooking or collect them at your various stops in Vermont. For example, for a one-page layout, you can have the place of the visit written at the top of the page in fancy letters. In the middle of the page, you can have a few photographs, brochures or a memento or two. Then down the sides or at the bottom of the layout, you can include stickers or small icons of activities that were enjoyed at the attraction or activity center.

Thursday, April 4, 2013

Three Classic Concepts for Scrapbooking About Family

A family scrapbook will not only help you bring back experiences, but may also cause you to value life. The family's history and lineage is a thing that you will never get weary of creating in spite of lost sleep and energy.

A father's heart to heart talk with son, a mom's unfailing faith to a daughter's initial take on relationship and love - they are the reasons why you think of family important. It's the compassion and affection which makes family real and alive. They are also the values that you will carry and pass on to your children all the way to their own children. As for scrapbooking concept and ideas, best selections are also associated with grandparents, parents, sisters, brothers, uncles and aunts.

A family scrapbook will not only help you bring back experiences, but may also cause you to value life. The family's history and lineage is a thing that you will never get weary of creating in spite of lost sleep and energy. In terms of possible theme or family scrapbooking ideas, you just need to think of previous birthday celebrations, wedding anniversaries, reunions, get-togethers or simple dining outs.

The following are great scrapbooking family ideas:

Family Tree

This could involve plenty of labor yet who cares, especially when the work involves your family. Try to document your family tree and locate your family background via genealogy or some other methods on the internet. There are offered professional services that may help you with this undertaking. Gathering pictures and classic photos are absolutely must -haves. Try to seek advice from older relatives or family members for old photos and pictures. Use birth places and natal dates as inclusions in your family tree theme. Request for old copies of photos and have everything scanned. You can even consider affixing small photos to recognize family members in an instant.

Family Occasions

Be it a wedding ceremony, childbirth, reunion, family vacation, trip or Christmas day, what is important is that you provide the appropriate photographs and embellishments to jazz up a page layout. You can think of individual and separate pages for each occasion or focus mainly on a particular gathering as the potential layout. Regardless, you should find quality photographs and brighten it up with accessories and embellishments for it to be really get noticed.

Family Accomplishments

Think of family-related awards, certificates or trophies and for sure, you will find a stash of photos hidden beneath beds or on the inside locked compartments. The purpose is to create a motivating and inspiring page. It's also a perfect way to pay honor to older family members.

History and heritage is not just pertaining to family parties or your sibling's special skills. You may also want to consider practices and values, as part of the family's heritage. Even long-standing recipes and china are family heirlooms that you may include in a scrapbook page. Besides, you're constructing a layout for the reason that you want to revel on cherished moments and times spent together with family. You wish to remember an occasion which has long been gone, all but forgotten.

Scrapbooking can make all of these attainable and in a way, scrapbookers are gratified and pleased. Having a family or heritage scrapbooking is another source of pride and great feeling. For all you know, you just have to find your way home and retrace those significant steps.

Wednesday, April 3, 2013

Scrapbooking Ideas for Home Decor

Paper crafters and scrapbookers often amass a large quantity of supplies and wonder at other ways to put them to use. Some crafters create practical home decor that matches their color schemes and the feel of their home with a variety of scrapbook papers and products. All types of ideas can spruce up your home to make it warm and inviting.

Die Cut Framed Project

Frame updated die cuts in a variety of colors for a fresh home decor idea. Add several different die cut images to the mix to add interest to the project. You can die cut your own images or borrow the die cut machine at your local scrapbook store. This framed project can bring a country or Christmas theme to life if you use primitive stars and a heart or Christmas trees and an angel.

Decorative Clocks

Purchase a clock kit from a craft store. Cover the kit with scrapbook papers, embellishments and numbers to match your home decor as desired. Use vintage or travel papers for a French country or Parisian look. Use baby-related papers or nursery rhyme embellishments for a special nursery clock.

Canvas

For a very simple, yet striking project, buy several blank canvases in the same size and plan an arrangement on your wall space. Use coordinating patterned papers to cover the canvas. Adhere the papers using a decoupage medium. Paint the edges of the canvas, if desired. This project works well in an open area in a living room or family room, or over the bed in the master bedroom.

Door Hangers

Buy a door hanger and cover it with scrapbook supplies. Use a decoupage medium to adhere scrapbook papers. Add ribbon, sparkly gems and a photo for a girl's room door hanger. Use fiber or twine, buttons and a photo for a boy's room. This project also works well for the bathroom door or a baby's room.

Home Decor Accents

Buy inexpensive foam balls from a craft store and a bowl to place them in for the coffee table. Cover the balls with scrapbook paper, ribbon, buttons and flowers. Adhere the supplies with adhesive dots, decorative straight pins or decoupage medium for a project that will coordinate with any color scheme and decor.

Tuesday, April 2, 2013

Scrapbooking Ideas for Vintage Cards

Your scrapbook supply likely contains many items that you can easily translate into making your own cards. Vintage cards demonstrate an appreciation of an earlier time and capture this nostalgia. Papers, embellishments, buttons and a variety of scrapbook techniques can help you create the vintage look you are going for.

Heritage Card

Use an old black and white photo of one of your own family members to make a card. Glue the photo in the center of the front of your card along with your caption. On the inside of the card write about the event in the picture or your memories of the individual. Stamp sentiments or images around the card or to the background of the page. Metallic paper corners will provide a basic frame that matches the tone of the vintage card. Give the card to the person whose picture is depicted or a close family member.

Pieced Card

Get the inspiration for your vintage card from an image. Use a picture of a Victorian woman, nature or a picture from an old fabric pattern. Paper piecing lets you remove just the image from your inspiration page. Adhere the image to your card in a prominent location. Supplies that coordinate with the image colors will help you make the card in a cohesive design. Add chipboard letters to the front cover, antique papers in gold, brown and gray shades for the inside of the card, and vintage embellishments. Use old buttons, brads and vintage embellishments that have an old world look like clocks and birdcages.

Window Card

One way to make a traditional-looking card into a vintage card is by crafting card stock to look like a frame around your picture. Glue an old picture from your personal collection, a book or a magazine. Cut out a piece of card stock that is the same size as your photo. It can be an oval, square or rectangle so that it looks like a picture frame. You can use other antiquing methods around the frame to make it look older, such as embossing, using chalk or painting. Cut out the middle area of your frame and glue it on your picture. Place the picture frame on the front of your card. Add other vintage touches to the inside of the card, such as a monogram, an old envelope with a piece of stationery sticking out of it, a seal or vintage rub-ons.

Fabric

Fabric can tie in an old look around newer supplies. Place a doily on the front cover of your card for an instant time rewind. Glue a piece of a floral fabric to the inside of your card. Layer your other elements on top of the fabric. Lace can serve as a border to your card or as a picture frame. Various papers that are cut in squares can be used together in a patchwork to resemble a quilt.

Scrapbook Ideas for Artist Trading Cards

Artist Trading Cards (ATCs) are original works of art that measure only 2 1/2 inches by 3 1/2 inches. The Artist Trading Card project was initiated by Zurich artist M. Vanci Stirnemann in 1996. The only rules are that Artist Trading Cards should be the specified size, they should be traded instead of sold and artists should write their names and contact information on the back as well as the title of the card and the edition number. Once you've collected a number of ATCs, putting them in a scrapbook helps to preserve them and make a memorable album.

Pocket Pages

Several scrapbook supply manufacturers have responded to the Artist Trading Card movement by designing pocket pages that fit the 2 1/2-inch by 3 1/2-inch cards. Using pocket pages to make an ATC scrapbook is nearly effortless because you just slip the cards into the plastic pages. One advantage of this system is that you can easily view the backs of the cards for information about the artists. You can also add cards to your album as you collect them without having to create new pages or scrapbook designs.

Rotary Card File

A rotary card file isn't a scrapbook in the traditional sense of the word. You can't close up a rotary card file and sit it on a bookshelf, but you can use one to display and store your Artist Trading Cards on a table or desk. All you need to do is get a rotary card file punch that matches your card file. You'll have to punch the holes on one edge of the Artist Trading Cards, but then you can insert them in the card file and sit them out. They make a wonderful conversation piece for your office or home.

Traditional Scrapbook

For a traditional scrapbook that allows you to flip through the pages of a book, acquire an archival-grade scrapbook and photo corners for holding the Artist Trading Cards in place. Some photo corners are self-adhesive; others must be glued into place. Since you know that all the ATCs will be the same size, you can set up your pages ahead of time to hold the 2 1/2-inch by 3 1/2-inch works of art. Arrange the ATCs in your scrapbook by themes, artists or dates acquired.

Event Scrapbooks

Artists often trade ATCs at ATC swaps or other events such as gallery openings. Create small scrapbooks for individual events so you can keep track of which artist you met at which event. To make small event scrapbooks, buy blank scrapbooks that are 4 inches by 6 inches or smaller. Create covers for the scrapbooks that indicate the event and the date. If you have a leftover ATC of your own that you swapped at the event, use it as the artwork for the cover.